
And She's Back… I did indeed spend some quality time in my studio and I was able to create in a way that makes me very, very, SUPER, DUPER happy.

I digress….on with the blogging.

 Tim Holtz posted his last tag for 12 Tags of 2012. Ah, but instead of 1 tag (December), he posted 2 tags. Why 2 tags? Well, it was just last February when Tim shocked
***In all honestly some of it is AMAZING and some is down right scary but it is fun to see what is being made. I also gotta say it is hilarious how many of his minions come from Communist Bloc Countries.
I digressed again..like BIG time. Back to the 2 tags….Since Tim started the 12 Tags of 2012 in February, he didn't have a January Tag and has long promised to make-up the missing tag. So we get 2 tags and game on! I'm going be straight with you…this is a Photo.Intensive.Post and apparently as I edit and re-edit a Word.VOMIT.Post as well. You can always scroll down to the photos and don't forget I have a Tumblr that just has photos of the projects with a link to the specific post.
First let me show you Tim's Tags.
 |
| Tim Holtz 12 Tags of 2012 December and January 2012 Source: Tim Holtz's Blog |
My TAGS
Card #1
My version of the snowman card started with this.

I don't LOVE it. I'm not fond of the way this particular stamped image (it's from Tim's Christmas Time) turned out using with the techniques Tim used. I hate fussy cutting…like I really, really hate fussy cutting and I don't like the way the Distress Marker colors look over the black stamp ink. I will say in person the image looks better than the photograph because the beard and fur on the coat and hat are smothered in Rock Candy Distress Stickles making them pretty and sparkly.
Whatever the reason, something is off, so I decided to play around with 2 of my favorite stamp images; a pretty wedding/party dress (source unknown) and the dragonfly from Tim's recent Stamper's Anonymous release Classics 1.
The dress is whimsical and pretty enough I wanted it to be a wedding card. It is perfect for coloring with Distress Markers AND it is simple enough for me to fussy cut without a lot of stress and it would still look good.

It just needed a quick change in color scheme, a different word to die cut from the Mirror plastic (I used the Sizzix Alterations Word Play die. Using scissors, I cut the Idea-ology Mirrored plastic to cover the individual letters I needed, laid them on the individual letters face down and ran it through the Vagabond. I added an Idea-ology Word Key rather than the snowflake and now I have a terrific wedding or engagement card.
Keeping the same design but switching up the colors and the metal embellishment led to this…

Imagine how easy it would be to make this wedding card into a birthday card. Simply restyle the wedding dress into a party dress (wild colors, add trim or rhinestones), substitute the word along the bottom to something like You Old or Party or Fun or Celebrate. Finally, switch out the metal embellishment to something more FUN less ROMANCE and you have a very special birthday card.


My final version of Tim's snowman card involves a dragonfly. This dragonfly stamp is one of the first stamps I every bought…in other words I've had it forever. Apparently Tim also has owned it forever and has loved its as much as I have because he just re-released it in Classics 1 collection with Stamper's Anonymous.
I went with a more vibrant color scheme.


I sprayed the cut dragonfly with Heidi Swapp's Gold Color Shine spray which sadly doesn't photograph well because it really adds a lot of beautiful shimmer.
Card #2
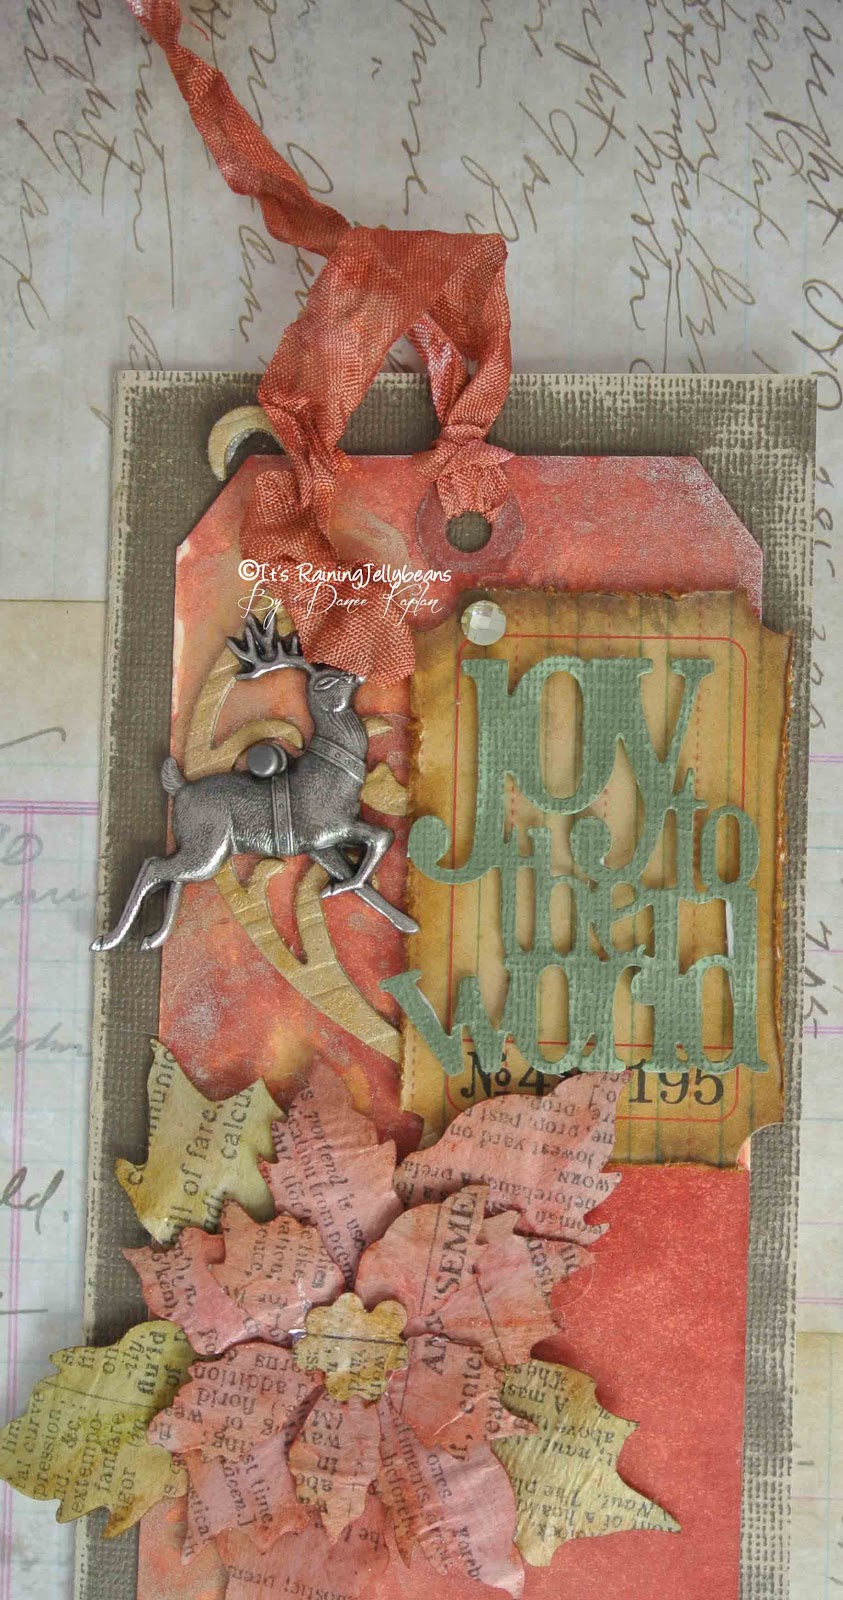
On to design No. 2 AKA the Christmas Tag. I actually had all the parts and pieces to make this tag exactly as Tim did. Since I had not yet used the Alterations Poinsettia or Stacked Word Christmas dies and because no matter how hard I have tried, I have never been able to figure out what to do with a flourish from the Elegant Flourishes, I decided to go ahead and make the same tag.


Final Thought
Last week, I posted 2 ideas for using the pile of tags one ends up with when one becomes Holtz-ified, which you can read here. It is ironic then that since that post, two of my favorite bloggers have posted their own ideas for using tags.
 |
| My Tag Card |
Let's review what I did: First, I made my tag into a card. I cut a piece of cardstock to 6 1/4 X 6 1/4, scored it down the center at 3 1/8, folded it in half, attached the tag to the front and punched a hole through the FRONT of the cardstock card to match the hold in the tag. I tied a pretty ribbon bow through the holes, closed the card and snipped off the top edges (front and back of card) to match the tag. |
| Inside of my Tag Card |
My second idea was to display the tags using the Alterations Small Easel.

Now on to Tim, Paula, and Deb's ideas.
You may have noticed that Tim made his tags into rectangle cards. He cut a base from cardstock measuring 7 1/2 x 7 and scored and folded it at 3 3/4 (on long end). Simply attach the tag to the front of the card, centering it carefully and you have a pretty card measuring 3 3/4 x 7 inches.


My friends Paula at Deb at 2 Gypsy Girls made their tags into cute Gift Card holders that I am head-over-heels in love with.
 |
| Gift Card Holders by 2 Gypsy Girls. Source: One Lucky Day |
I will definitely be making 1 or two of these darling tags…and oh what I wouldn't do to get some of that green and deep red seam binding. It is gorgeous. For directions to make these sweet gift card holders check out their blog.
Laters Baby….


Your tags are absolutely fabulous and the card tag is brilliant. You definitely deserve to be one of the winners this month.
ReplyDeleteThese tags are stunning! i especially like the dragonfly and the 'tagged' card idea!
ReplyDeleteWhat a fun read this was. Your description of Tim's shocking departure from his Christmas tags to year round tags is funny! And so true. OK, off to the studio with me...gotta make the 2 Dec tags, plus some cards, plus add more cards to my Christmas receipt organizer...And those gift card holders you mention. I'll have a tall, non-fat, extra hot eggnog latte, please. Charlotte
ReplyDeleteI am in love with the dragonfly and dress cards they are stunning, you also did great with the poinietta. your dress stands out so much in the gallery as its just a wonderful and unique twist on this months tags.
ReplyDelete