So on with it....
The Vision
The bride- whom we will call "Ginger" (mainly because that is her name) envisioned a shabby-chic vintage-barn space with a gorgeous eye-popping dessert buffet filled with tiny desserts. Yes, I know... she picked an ugly church basement rather than a barn, but go with it people-it wasn't my choice. Ginger had her heart set on giving her guests a big "WOW" moment as they entered into the reception space. Because of the room layout, the obvious choice was to put the dessert buffet against the back wall directly opposite the doors into the room. You can see this in the pic above and you can see more pics of the space before we started set up here. The next obvious design choice was to put the bridal party on the left side of the room because the right side was banked with a row of windows making it much more difficult to decorate- I didn't have time to sew curtains!
Ok, so the major layout is done...lets get decorating.
The Problems
Slow down there, Sherlock...we have some problem children to deal with first. We were able to quickly determine where to put the dessert buffet and where the bridal party would sit. That left the children's activity table along the right side of the room using 2 rectangle tables and for the rest of the guests we would use circle tables filling in the center of the room.
Sounds so easy doesn't it. Problem is there were several issues I needed to address in order to elevate this space into something worthy of a charming, shabby chic wedding reception. I won't lie, this is a big undertaking for only having 2 days. I mean if this was my full-time job and I had lots of experience and a crew it would have probably been a piece of cake, but I am not and I have not.
The first-and biggest problem is... its an UGLY ROOM. Ugh! The room is a functional church basement. It is large and beige grey and square and lifeless. While it certainly serves its purpose as a meeting room, it needs some serious help in order to become a space worthy of a wedding Design by Danee wedding reception. As I mentioned in the last post, the brown chairs had to stay. It was out of their budget to rent white chairs and while this broke my creative heart, I understand and respect her for sticking to her budget.
This room is ugly from top to bottom. From the drop ceiling and florescent lights to the broken grate (see picture below) to the brown chairs to the ugly carpet and the multiple metal doors...not that the brown doors are much better. I can't change the ceiling, the lights, the doors or the carpet, but I can make beautiful things that distract from those less eyesores and create an enchanted setting.
First, I had to address the eye sores that were completely unacceptable. The worst one being this hot mess that is along that back wall where I staged th entire dessert buffet.
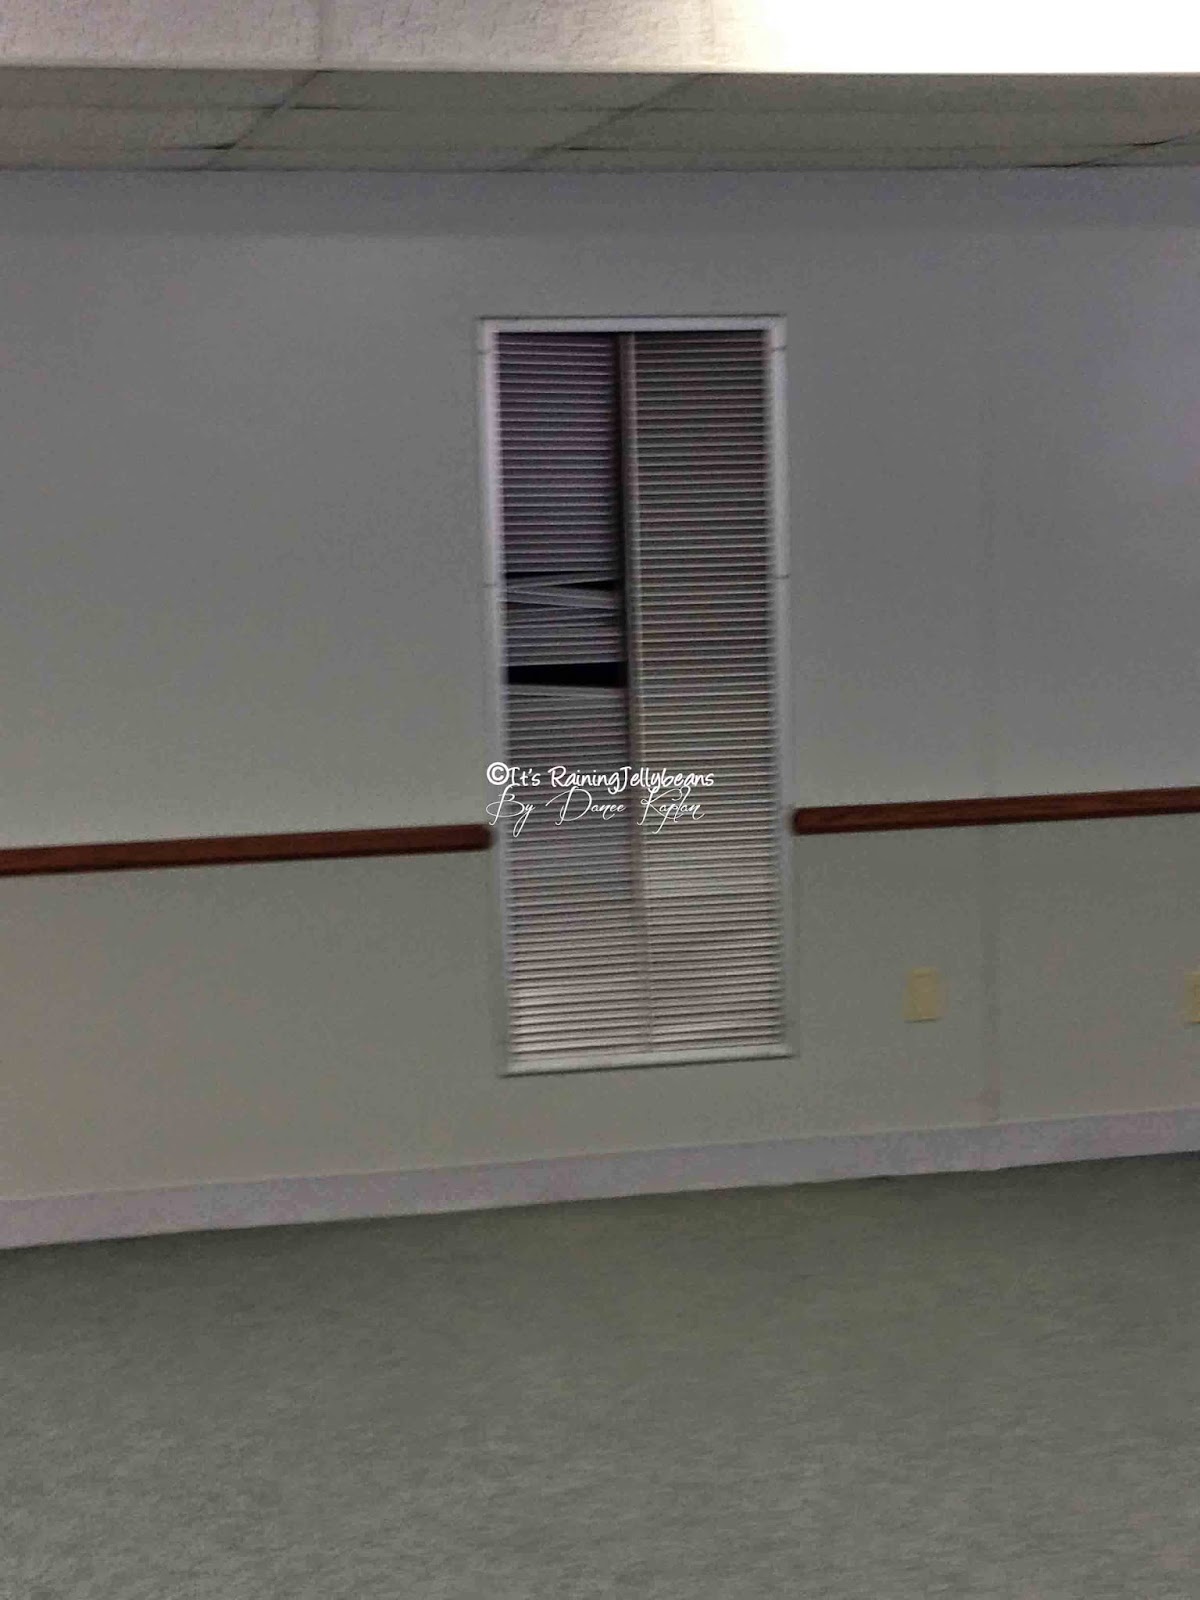
I rented several vintage doors from a very charming local store called Bella Patina. For around $20 per door I was able to get something that not only covered a large eyesore, but also helped added a lot of authenticity and charm to the "shabby chic" look that Ginger wanted. I covered the bent-up hot mess of a grate with this door. The patina is amazing on this piece and the burlap came already on the door. I added the gold tissue pom flower to the door handle. This became one of my favorite decor pieces in the entire room.

You can see from this photo that the bent grate was located right in the middle of the space we were highlighting but with the door covering it, nobody even knew it was there.

Next we had this exit door... U.G.L.Y. I decided against covering the "EXIT" sign itself- frankly it just seemed like it screamed "bad luck" and I didn't want to be responsible for anyone getting hurt. It was a compromise for sure but I did cover the ugly brown brown. Being that this is an emergency exit, I thought it best to NOT block it, so I used only a fabric curtain to cover it. This kept the exit functional while hiding the stark brown color.


I didn't get a good shot of the double metal doors behind this rented tri-fold screen, but you can see them peaking out and they are UGLY. The screen and a few poms did a great job of distracting the eye from the ugly doors.

I hid another ugly metal door behind several lengths of burlap and some paper flowers. Really anything that draws the eye away from the utilitarian-but ugly- parts of the space will elevate your party space. It is the attention to these small details that seem to be pointless but in reality make a huge difference. If I had more time-or a staff- I would have found big solid old doors to cover these spaces but given the time/budget contrasts I think the fabric worked well.

The space below is where the bridal table ended up. We did take down the pictures and slipped them into one of the classrooms behind the doors you see.

Can you believe this room has so many freakin' doors. We used all the rented doors and still had some gaps. Ideally, I would have covered all the room doors with vintage doors but I rented all the store had. I used the remaining muslin to cover the small areas the vintage doors didn't cover. I used hot glue to give it a sort of "gather" before hanging it. I simply put hot glue along the "seam line" and pinched the fabric together giving it a look of a gathered curtain. While this is purely an aesthetic choice, it gave the curtain a more finished look...you know, like I PLANNED it that way...I mean I did plan it that way...I did ;D.


More UGLY green metal doors....good lord...Randall, Mike and Sully would have a field day in this room.

Here is a shot of the bridal table and the doors behind it.

Here is from farther out in the room.
The next post will cover the centerpieces- all made of paper.